







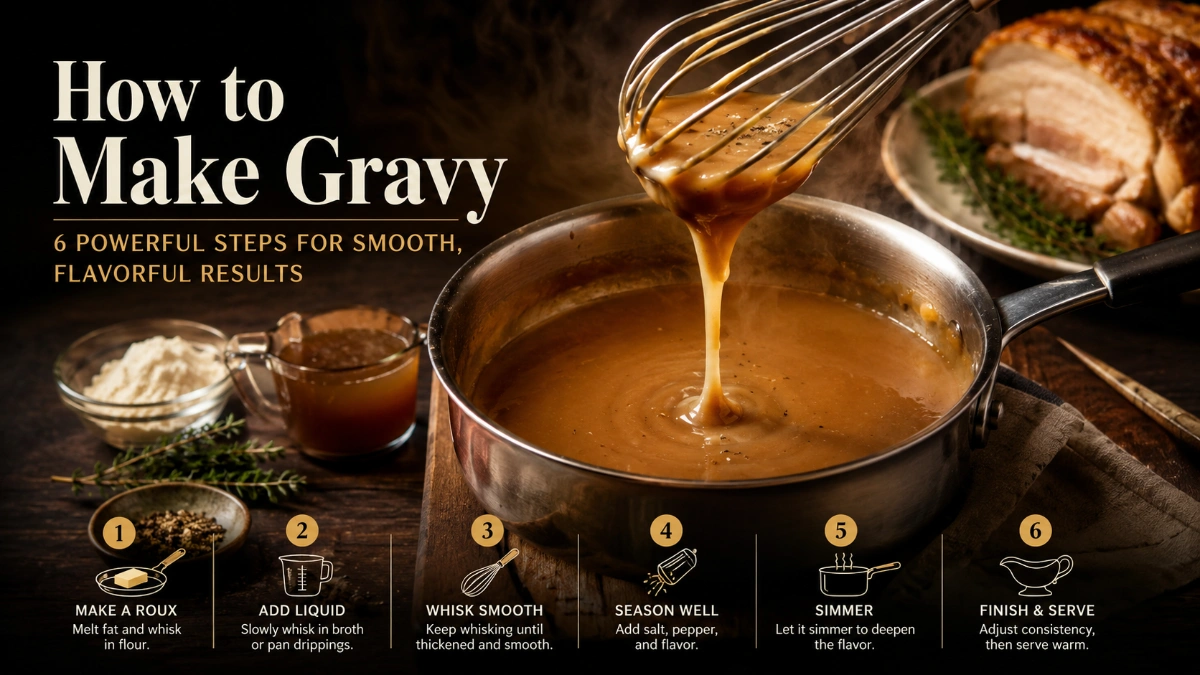
how to make gravy: A Smooth, Flavorful Method A good gravy starts with fat and flour, then uses gradual whisking and gentle simmering to turn drippings or stock into a smooth sauce. Start with a simple roux, add liquid in stages, and adjust salt only after the gravy has thickened. Start with the right base […]
how to make gravy: A Smooth, Flavorful Method
A good gravy starts with fat and flour, then uses gradual whisking and gentle simmering to turn drippings or stock into a smooth sauce. Start with a simple roux, add liquid in stages, and adjust salt only after the gravy has thickened.
Start with the right base
For about 2 cups of medium-bodied gravy, begin with:
- 3 to 4 tablespoons of fat: separated roast drippings, butter, or a combination
- 3 to 4 tablespoons of plain (all-purpose) flour
- 2 cups of warm stock, pan juices, or a combination
- Black pepper
- Salt, only if needed
- Optional: a small splash of water, stock, or dry wine for deglazing; thyme, sage, or rosemary
These quantities are a dependable starting point, not a rigid rule. Drippings vary in fat, stock varies in saltiness and concentration, and gravy thickens further as it cools.
Make gravy step by step
Here is how to make gravy from pan drippings or stock:
- Collect and separate the drippings. Pour the roasting-pan juices into a heatproof jug and let them stand briefly. Spoon off the fat, keeping the flavourful juices underneath.
- Deglaze the roasting pan. Set the pan over low to medium heat. Add a small splash of water, stock, or wine and scrape up the browned bits with a wooden spoon.
- Make a roux. Add 3 to 4 tablespoons of fat to the pan or a saucepan. Whisk in the same amount of flour until no dry flour remains. Cook, whisking, until it smells lightly toasted rather than raw.
- Whisk in liquid gradually. Add a small splash of warm stock or juices first and whisk it into a smooth paste. Continue adding the rest in several additions, whisking after each one.
- Simmer until it coats a spoon. Bring the gravy to a gentle simmer. Stir or whisk often until it thickens enough to coat the back of a spoon, then runs off in a smooth stream.
- Taste, then season. Add pepper first. Taste before adding salt, since both stock and pan drippings may already be seasoned.
The practical secret to how to make gravy without lumps is not a special ingredient: it is fully combining the flour with fat, then adding liquid slowly at the beginning.
Choose your liquid
The method stays the same, but the liquid determines the character of the gravy.
| What you have | Use it this way | Important adjustment |
| Roast poultry or meat drippings | Use a measured amount of separated fat for the roux; add the juices with stock | Hold back salt until the end |
| A small amount of drippings | Add the juices for roast flavour and make up the volume with stock | Do not add all visible fat automatically |
| No drippings | Use butter or a neutral oil, then add stock | Add flavour with deglazed onions, mushrooms, pepper, or restrained herbs if useful |
| Concentrated or salty stock | Dilute partly with water if needed | Taste after simmering, not before |
When deciding how to make gravy for roast meat, keep the browned bits and concentrated roasting juices, but do not use excess fat simply because it is in the pan. Fat helps form the roux; the juices and fond provide much of the roast flavour.
Control the thickness
Gravy should be pourable, not stiff. Because it thickens as it cools, take it off the heat when it is a touch looser than the texture you want at the table.
If the gravy is too thin
First, let it simmer a few minutes longer. This concentrates the liquid and lets the flour thicken fully.
If it still needs more body, choose one correction:
- For a classic roux texture: Make a small extra roux in a separate pan with equal parts fat and flour, cook it briefly, then whisk it into the simmering gravy.
- For a quicker adjustment: Stir cornflour (cornstarch) with cold water until smooth, then whisk in a little at a time. Simmer only until the gravy thickens and loses its cloudy appearance.
A flour-and-water paste can work, but it must be whisked in carefully and cooked thoroughly; an additional roux usually gives a more consistent result in flour-based gravy.
If the gravy is too thick
Whisk in warm stock, water, or milk a tablespoon or two at a time. Return it to a gentle simmer after each addition, because the texture changes as the added liquid warms through.
If the gravy is greasy
Skim excess fat from the surface. If the problem came from a very fatty roasting pan, add a little stock after skimming and whisk well; adding liquid alone will not correct a badly unbalanced fat-to-liquid ratio.
Learning how to make gravy well means using the spoon test and your taste buds, not forcing the sauce to match a single measurement.
Prevent and fix lumps
Lumps happen when flour is not dispersed before it meets a larger amount of liquid. The best prevention is to whisk flour into the fat completely, then add the first liquid addition slowly.
If lumps appear:
- Whisk firmly while the gravy is hot.
- Press it through a fine sieve for a smooth finish.
- Blend briefly with an immersion blender, if available.
- Return it to low heat and adjust the texture with stock if needed.
A whisk is easiest for this job, but a fork can handle a small batch in a pinch.
Build flavour without overdoing it
The browned bits left in a roasting pan and the concentrated cooking juices give gravy a savoury foundation. Deglazing releases them into the sauce, which is why this step often matters more than adding several extra seasonings.
To make gravy taste balanced:
- Grind in black pepper after the gravy thickens.
- Add herbs sparingly; sage and thyme suit poultry, while rosemary can be stronger.
- Deglaze with a small splash of dry wine if it suits the meal, then let it reduce briefly before adding stock.
- For vegetarian gravy, build depth with browned onions or mushrooms and vegetable or mushroom stock.
- If the gravy tastes flat, taste for salt first, then consider pepper or a little more stock.
Stock colour does not guarantee strength. Some dark stocks are mild, while a pale stock may be concentrated or quite salty, so final seasoning always depends on tasting the finished gravy.
Make gravy without drippings
You can still make a satisfying gravy without a roast pan. Melt 3 to 4 tablespoons of butter in a saucepan, whisk in the same amount of flour, then gradually whisk in 2 cups of warm stock.
Simmer until it coats a spoon, then season to taste. Use chicken stock for a chicken-style gravy, beef stock for a beef-style gravy, or vegetable or mushroom stock for a meat-free option.
This version of how to make gravy is particularly useful for mashed potatoes, sausages, meatloaf, or weeknight meals that do not produce pan juices.
Make it ahead safely
Make gravy ahead when it reduces last-minute work, but cool and refrigerate it promptly in a shallow covered container. Keep refrigerated gravy for 1 to 2 days, or freeze it for 2 to 3 months for best quality.
When reheating, warm it while whisking and bring it to a rolling boil. Add a small splash of stock or water if it has thickened in storage. Thaw frozen gravy in the refrigerator when practical, then reheat and whisk until smooth.
Frequently Asked Questions
For roughly 2 cups of medium gravy, start with 3 to 4 tablespoons each of fat and flour. Thickness varies with the stock, drippings, simmering time, and how loose or thick you prefer the final result.
Yes. Water works best when the gravy also contains flavourful drippings or deglazed browned bits. Without those, stock provides a fuller savoury base.
Use deeper-coloured pan juices or stock, or cook the roux slightly longer for a more toasted colour. Do not overcook it, because a very dark roux thickens less effectively and can develop a bitter taste.
Flour gives classic opaque, roux-based gravy. Cornstarch creates a clearer, glossier finish and is useful for quick thickening. Choose based on the texture you want rather than treating one as universally better.
The roux or the finished gravy needs more cooking. Keep it at a gentle simmer, stirring regularly, until the raw flour taste disappears.
Whisk in small amounts of unsalted stock or water, tasting after each addition. If this makes the gravy too thin, simmer it gently or thicken it with a small additional roux.
Yes. Make it up to 1 to 2 days ahead, refrigerate it promptly, then reheat it to a rolling boil while whisking. Keep stock nearby to loosen it before serving.
Yes. Freeze cooled gravy in a suitable sealed container for up to 2 to 3 months for best quality. Thaw it in the refrigerator when practical, then reheat it to a rolling boil and whisk in a little stock or water if needed.